Star Print Top (on sale) | similar Earrings
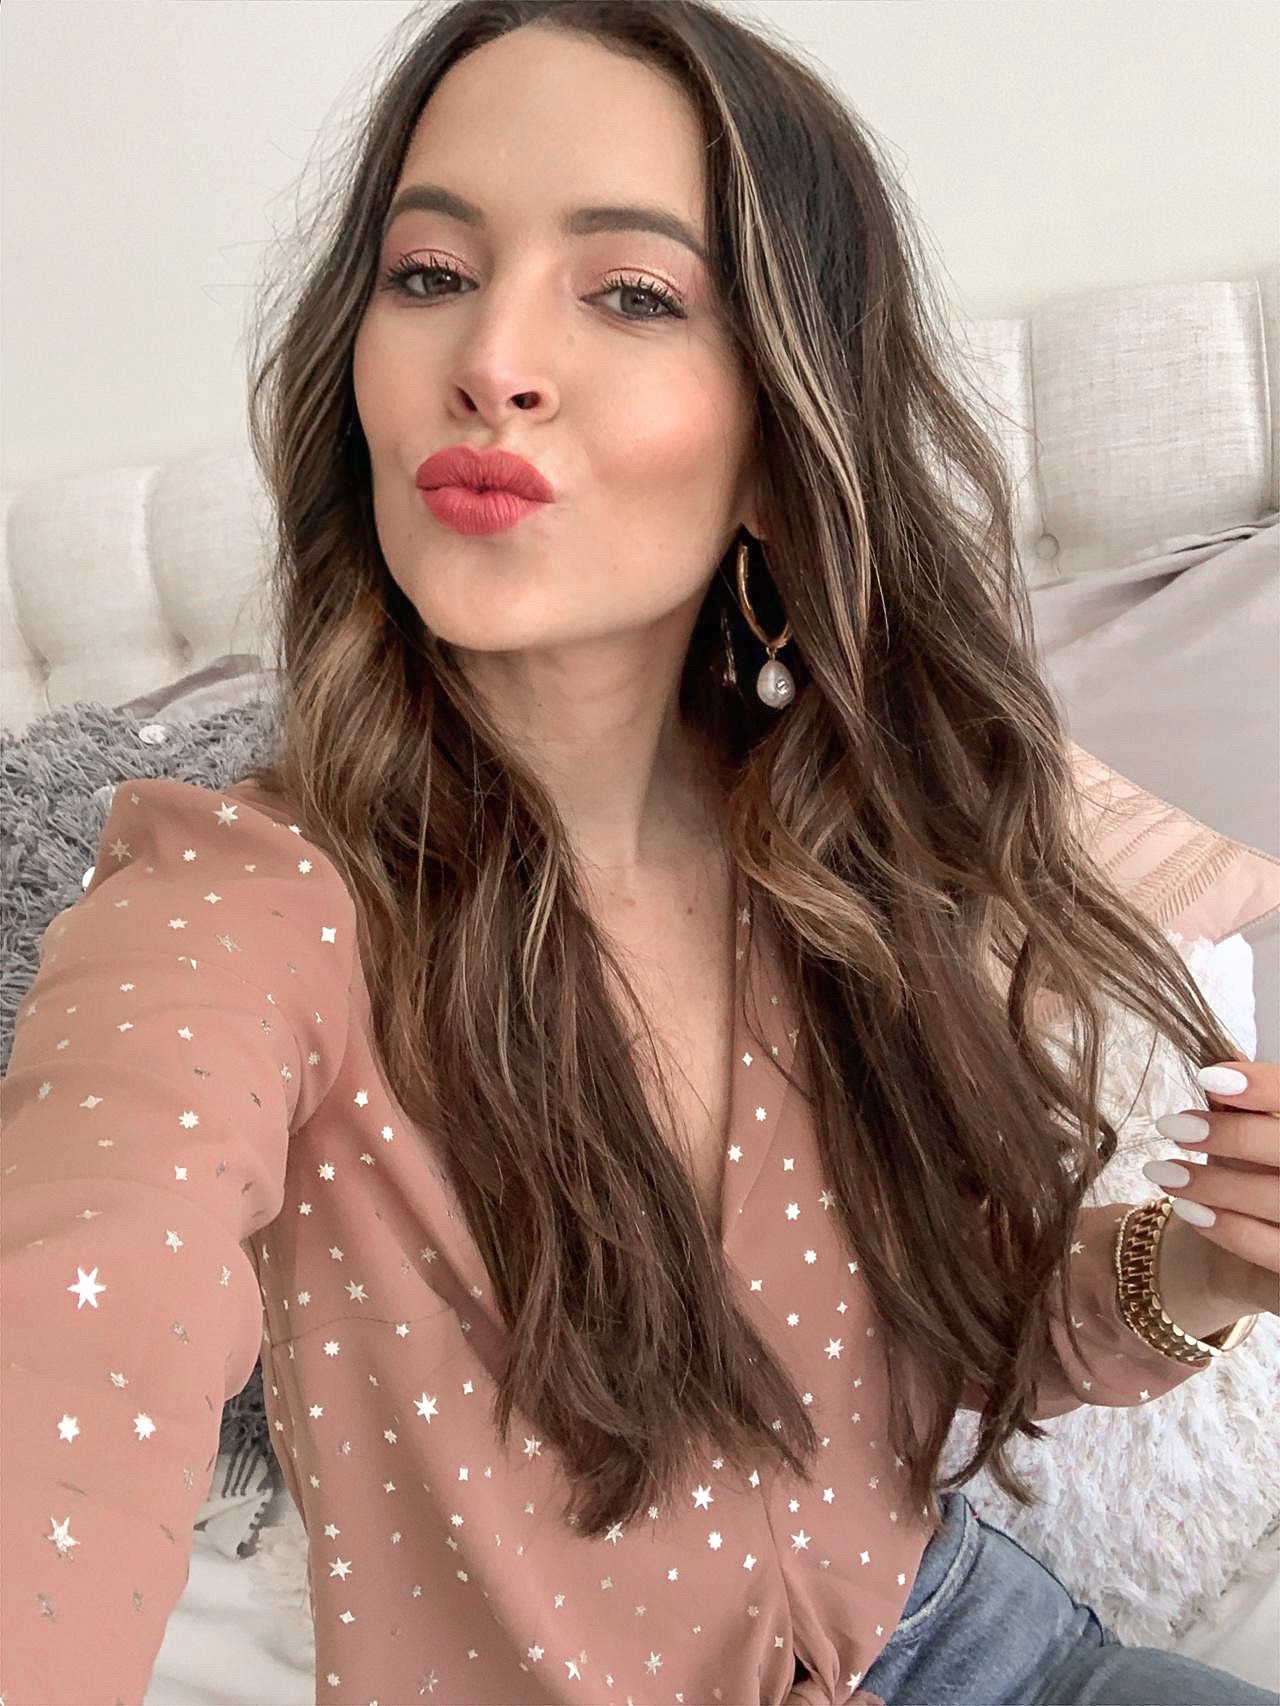
I’m usually pretty simple (and boring) when it comes to makeup but, lately — I have gotten a recent urge to switch things up now that the weather is getting gorgeous — and let’s be honest, now that I have a big bathroom where I can actually get ready in natural lighting… it’s the little things! I’ve been wearing a lot of pinks, corals, and blushes lately so I wanted to try a little something different with my makeup to play off that color scheme — for my skin tone (which is olive but on the fair side), I actually LOVE the way this turned out. It gives me very natural looking color and gives me a little life without the need for the sun! I’m ALL ABOUT a dewy glow during the warmer months and this look would be perfect for any spring/summer events you have coming up! I’m sharing all of the products I used to create this makeup look including shade info below. I also created a VIDEO TUTORIAL over on IGTV, so make sure to check it out if you like following along.
STEP-BY-STEP
- First up, I love priming my face using the Smashbox Photo Finish Primer which helps to blur imperfections and prep my face for foundation. This primer is silky smooth and lets my foundation and face products glide right on!
- Next up, I love using a little of a few products that I layer over one another. This Charlotte Tilbury Wonderglow Face Primer can be used over or under foundation and is perfect for helping to achieve a glow that looks like it comes from within. I don’t love it as a foundation primer as much as I love the Smashbox one above, so I use a little and blend into my cheeks and layer my foundation on top. It instantly makes my skin look hydrated and is great to wear in place of foundation on a lighter makeup day.
- One of my favorite foundations that feels so lightweight and provides light coverage — this Charlotte Tilbury Light Wonder Foundation (shade 3) is perfect for spring and summertime. I dot a little of this onto my cheeks, chin and forehead and blend with my foundation brush.
- Last up to layer on, I apply this Charlotte Tilbury Flawless Filter (shade 3) to the apples of my cheeks, down the bridge of my nose, center of my forehead and a little on my chin. It acts as a subtle highlighter for an immediate dewy complexion.
- For under eye concealer, my number one trick is to make sure your under eye is hydrated (so using a lightweight eye cream is a must, my daytime favorite is THIS ONE). For full coverage concealer, my go-to is the cult classic Tarte Shape Tape (shade Sand) which I add in an upside down triangle and to any other darker spots on my face. Using my finger first to warm and really blend the formula into my skin, I then take a damp beauty blender (repeat after me: MUST USE DAMP) and dab into my skin to work it in, making sure to blend onto my eyelid as well. It looks like a ton of product at first, but with the damp beauty blender, it immediately starts to smooth out and brighten my under eye.
- Using the same damp beauty blender, I tap it into Charlotte Tilbury Airbrush Flawless Finish Setting Powder (shade Fair) and apply to all the areas I just used the concealer above. This helps to lock in the concealer so it won’t crease or move throughout the day. I love using this color because it helps to brighten without being too light — you all know the struggle of the dreaded flash photo that gives it all away.
- Moving onto the eyes, you all by now probably know my love for cream eyeshadow. I apply a layer of Charlotte Tilbury Eyes to Mesmerize (shade Jean) to my full eye lid and dot into the corners of my eye (immediately helps to brighten and will make you look more awake).
- Moving on to the main event, I am OBSESSED with this Tarte Chrome Paint Eyeshadow (shade Frosé) and it’s the reason I wanted to create this look in the first place. Using my ring finger, I tap the color across my crease. The color is buildable and has a slightly creamy consistency without being too silky, so it melts right into the skin (but still lets you move it around to blend). It IS sparkly, so this is definitely for a night out or event, but the pop of shimmer is so gorgeous and pigmented. I love the mirrored effect! I also love to add it to my under eye for a pop of color against the liner below.
- For a little dimension, I love using Laura Mercier Caviar Stick (shade Coco) on the outer corners of my eye and as eyeliner for the bottom lash line.
- To fill in my brows, I’m using Benefit Ka-Brow Cream Gel (shade 3) that comes with its own brush! I start by lining the bottom of my brow from my nose out to define and outline the area — and then blend upwards to fill then in while trying to follow the natural hair lines.
- To contour — (my favorite trick EVER), I use this palette from Charlotte Tilbury. Using the sculpting brush from this set, I dip it into the dark shade and line under my cheekbones, the top of my forehead (blending into the hairline), and under my jaw (blending down onto my neck). I then take the fan brush from the same set, dip it into the darker color, and bring down the sides of my nose from my eyebrows down. I swipe across the tip to define my nose!
- For some MUCH needed color, I apply a little of this Smashbox Blush (it’s technically highligher but works as a blush for me) to the tops of my cheeks.
- For my lashes, PRIMER is a game changer (if you’re not using it, you MUST). I love using this Marc Jacobs primer — the key to using primer is that you cannot let it dry before layering on your mascara. I do ONE EYE AT A TIME (primer then mascara) and then move on to the other eye. For mascara, I love Too Faced Better Than Sex for a ton of volume and a little length.
- If you mess up and get any mascara on the eyelid, you can easily apply a little of the cream eyeshadow over the mascara mistake — that’s what I LOVE about cream eyeshadow! You can fix a mistake AFTER mascara without having to worry that the powder will fall on your lashes!
- For highlighter, I love my drugstore find, Physicians Formula Butter Highlighter (shade Rose Gold) and I’ve been using it for years! It’s a creamier consistency but blends and melts into the skin so beautifully and adds a rosy color that looks sunkissed. It also smells like coconut and is HEAVEN on earth. I apply to the top of my cheek (we just defined the cheek by contouring), down the bridge of my nose, the tip of my nose (GAME CHANGER), above and below my lips, and on the arches of my eyebrows.
- Since I tend to gravitate towards matte lip colors always, it’s fun to add a little pop of shimmer to my lips using these Smashbox shimmer drops.
- To finish off my makeup, I apply a coat of Huda Beauty Matte Cream (shade Game Changer) — the most perfect pink/color color EVER. It’s becoming my favorite lip color… FAST.
- To set my makeup, this boscia Rosewater Mist pulls triple duty — acting as a setting spray, while also moisturizing and toning the skin. You can also spray it to help refresh makeup done earlier in the day to get back that dewy glow!
SHOP THE PRODUCTS USED
scroll to see more —->
SHOP THE TOOLS USED
scroll to see more —->

1 Comment
Carina
April 28, 2019 at 3:28 amBeautiful make-up!
Carina | https://carinazz.blogspot.com/